Jewel-like ornament finishing - Tutorial
Give a jewel-like finish to your cross stitched ornaments using beads and ribbons to create embellishments. Step by step tutorial.
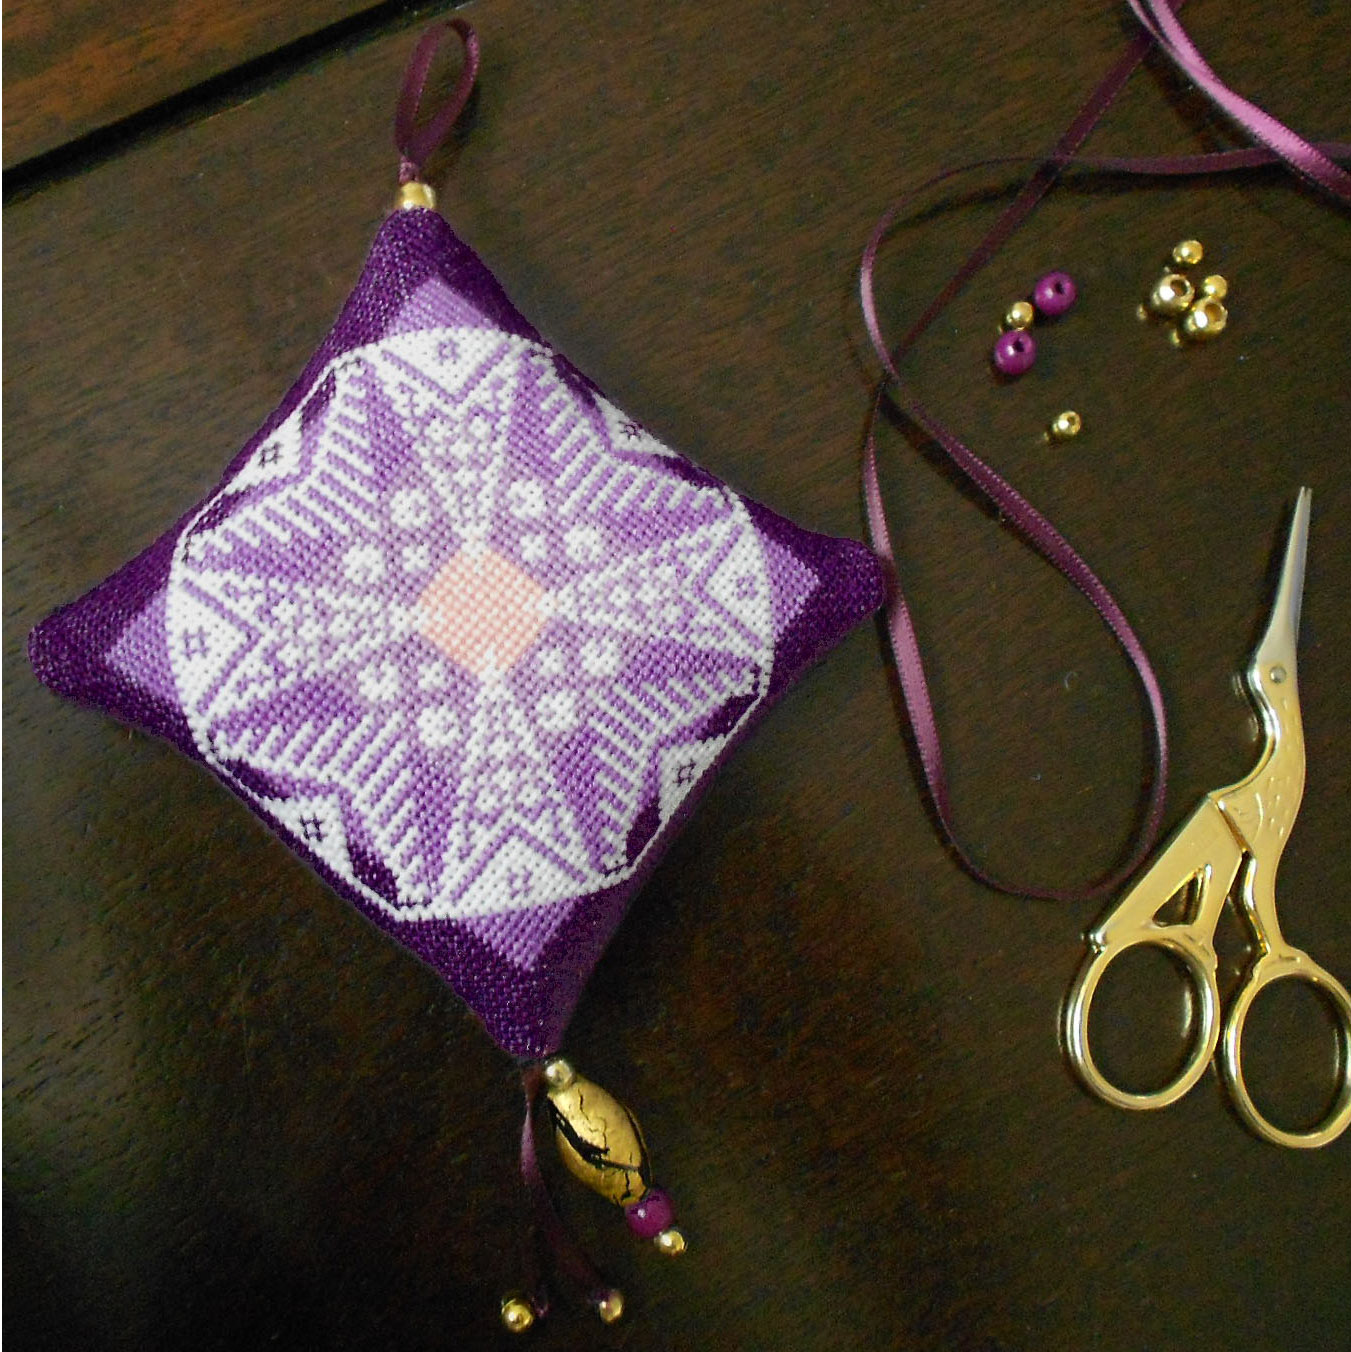
The cross stitch design featured in this tutorial is Gracewood Stitches' Twighlight ornament
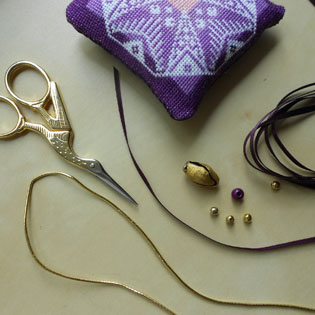
Supplies
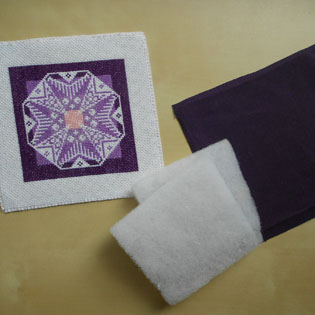
Cross stitched design:Twilight by Gracewood Stitches, cross stitched over 1 thread on 22ct evenweave. Stitched size 3 ¼ x 3 ¼ inch (8.5 x 8.5 cm).
- 4 inch double satin ribbon (3mm - 1/8 inch wide)
- Polyester wadding (or left-over yarn for stuffing)
- assortment of metallic and color beads, one large decorative one, some medium and small ones
- cotton fabric for back matching color of stitched piece
1. Cushion assembly:
Cut out stitched square leaving 3/8 inch allowance outside the stitched area. Cut out a square of cotton fabric the same size.
Cut wadding the size of the stitched piece.
Position the two squares of fabric right side against right side. Machine or hand sew all 3 sides and 4 corners, leaving an opening on 1 side.
Turn inside out. Gently push out and shape corners. Add wadding.
Close the last side with a slipstitch.
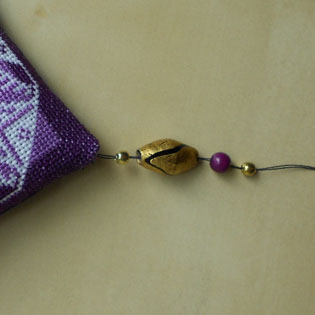
2. Dangling ornament:
The dangling part of the ornament consists of elements (A) and (B):
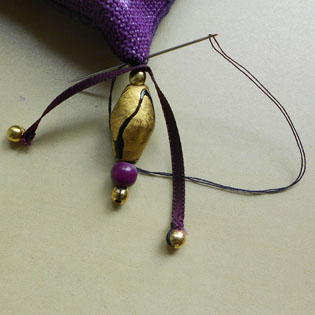
Dangling Bead ornament (A):
Thread a needle with sewing thread and secure to one corner.
Thread the beads in the order of your choice, finishing with a small one.
Skip the last and thread the needle back through all other beads.
Pull and adjust thread so that beads are close enough but can gently dangle.
Secure with a stitch or two but do not cut thread (park your needle).
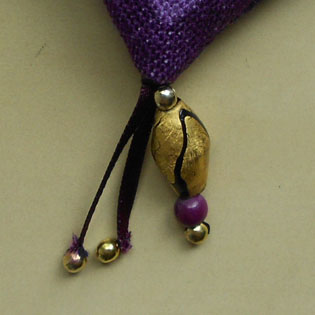
Dangling Ribbon ornament (B):
Cut a piece of ribbon double the size of the bead ornament plus an extra ½ inch. Sew a small bead at one end of the ribbon, trim end and add a spot of glue if necessary. Sew another bead at the other end of ribbon.
Fold the ribbon in two, close to the middle but not exactly so that beads hang at different heights.
Retrieve the threaded sewing needle. Secure the folded part to the to tip of ornament. Cut thread.
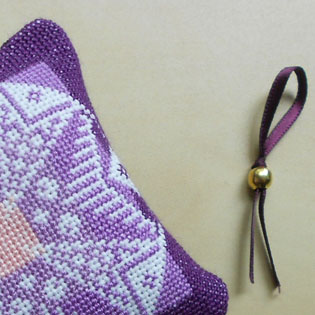
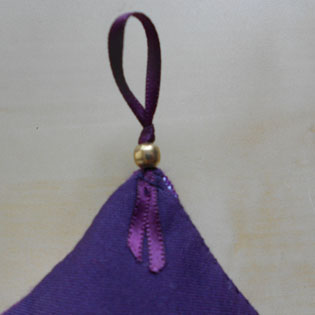
3. Loop for ornament top:
Cut a piece of ribbon double the size of the desired loop plus an extra inch 1/2.
Fold the ribbon in two. Make a knot and adjust loop to desired size before tightening.
Thread bead through both loose ends.
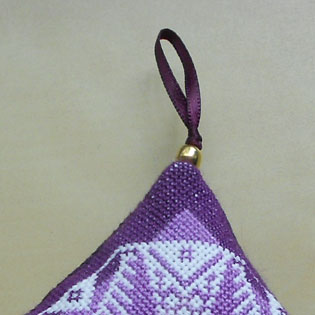
Sew and secure ribbon to top corner at the back, just below the bead.
Trim ends of ribbon with bias cut and leave them hanging in V shape on back of ornament.
You're done!

We hope you have a lot of fun creating this pretty ornament!
The Creative Poppy team
If you enjoyed this Creative Poppy Tutorial and made some great ornaments, do send us a picture. We would love to have your feedback and see all the great projects you made. Thanks!
>> see all Tutorials and Ideas for finishing Christmas Ornaments
Ornaments to cross stitch
The pattern featured in this tutorial is:
Twighlight ornament by Gracewood Stitches
>> see all Christmas ornaments (all designers)


.jpg)


